
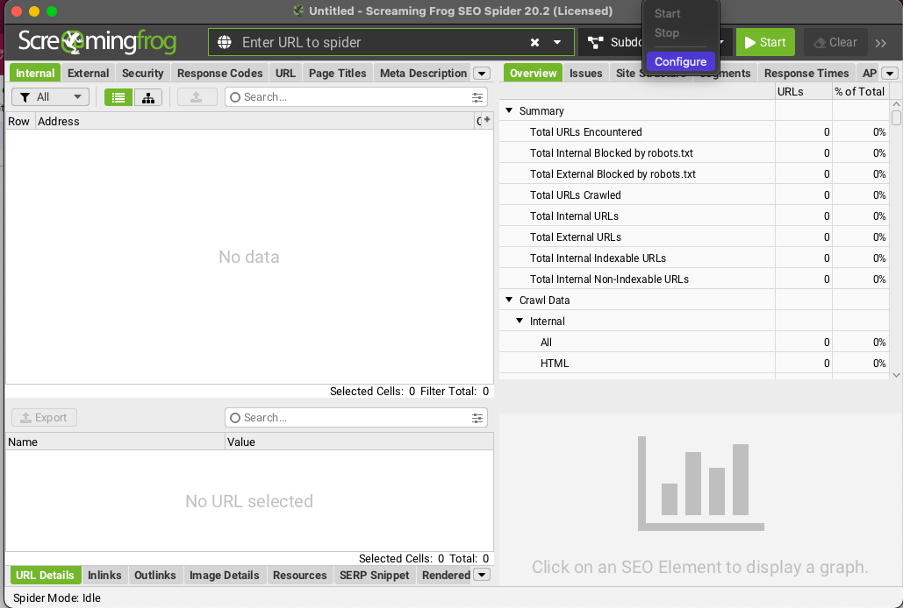
Screaming Frog SEO Spider is a highly regarded tool within the SEO community, offering a comprehensive solution for conducting thorough website audits. Based in the UK, this versatile software mimics the behaviour of search engine bots, allowing users to crawl websites and gather crucial data for technical SEO analysis. Screaming Frog is essential for enhancing a website’s visibility and overall performance in search engine results, whether to identify broken links, pinpoint duplicate content, or evaluate metadata.
Screaming Frog’s ability to integrate with various API connectors is one of the key features that sets it apart from other tools like it. This functionality extends the tool’s capabilities, so users can pull additional data from services like Google Analytics, Search Console, Ahrefs, and Majestic. These integrations provide a richer dataset, combining technical SEO insights with actual user engagement metrics, which is invaluable for crafting well-informed SEO strategies.
Screaming Frog’s integration with the OpenAI API is one of the latest advancements in its offering. By leveraging custom JavaScript within the tool, users can utilise ChatGPT for various applications.
This includes automating content analysis, generating meta descriptions, and even conducting sentiment analysis of website text. Combining Screaming Frog’s robust crawling capabilities and ChatGPT’s natural language processing power brings a new level of efficiency and insight to the SEO auditing process.
You don’t need to know how to write JavaScript to use this feature. Screaming Frog provides ChatGPT templates that can be easily adjusted by following the guidance in the comments of each snippet. It’s accessible without programming experience, so, all users can benefit from the advanced customisation options, no matter their coding level.
In this article, we’ll review the custom JavaScript feature within Screaming Frog that allows for advanced customisation and integration of tools like the OpenAI API:
-
- How To Create A Custom ChatGPT JS Snippet?
- Adjusting Your Prompt
- Testing It
- Adding the Snippet to the Library
- How to Enable JavaScript Rendering?
- Extracting Data
- Common errors creating a custom ChatGPT Javascript Snippet
Each section will guide you step-by-step, from crafting a custom ChatGPT snippet tailored to your needs to testing and integrating it within Screaming Frog. We’ll also cover how to enable JavaScript rendering and extract valuable data from your crawls. You can use this to help you leverage the full potential of Screaming Frog’s customisation features for more effective SEO audits and analysis.
How To Create A Custom ChatGPT JS Snippet
There are various preset ChatGPT JavaScript snippets available in the SEO Spider that only require an OpenAI API key.
There’s also a template that’ll be perfect for creating our custom snippets.
Please note you will require the Screaming Frog paid subscription & OpenAI API key with credit.
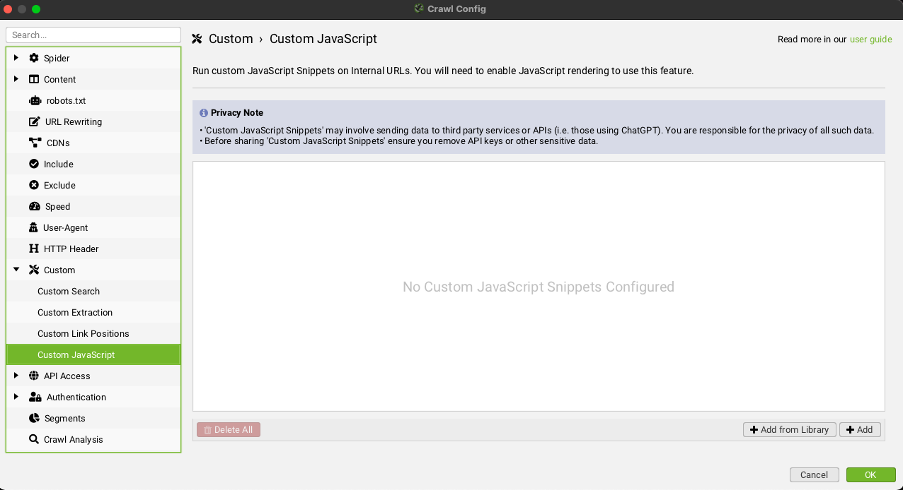
Open the Custom JavaScript Config:
Navigate to ‘Config > Custom > Custom JavaScript’ and click ‘Add from Library’ in the bottom right.
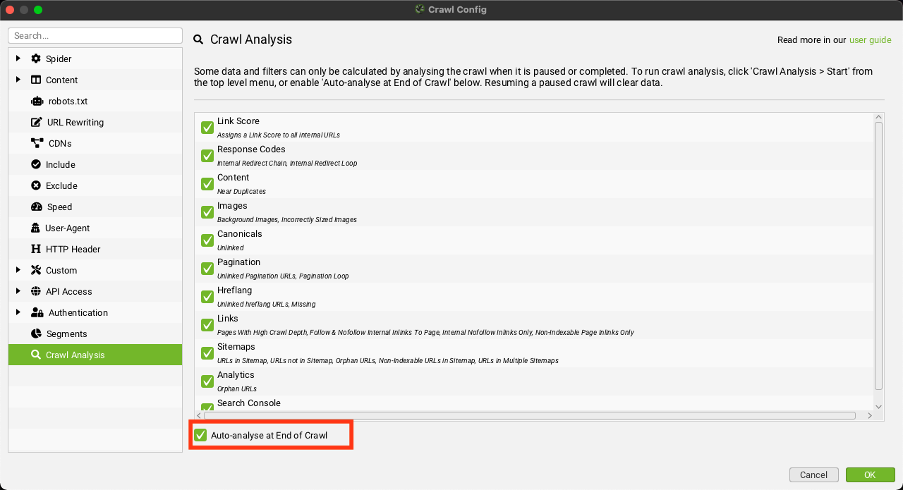
Or open the Crawl Analysis and Configure it there. ‘Crawl Analysis > Configure’. Make sure you check that it will be launched after the crawl:

Then in the Custom Section, select Custom Javascript:
The ‘System’ tab offers a library of pre-configured JavaScript snippets, including numerous ChatGPT snippets marked with ‘(ChatGPT)’.
Select any of these snippets and simply add your OpenAI API key to use them.
The snippets highlighted below in red are the default options that only require an API key.
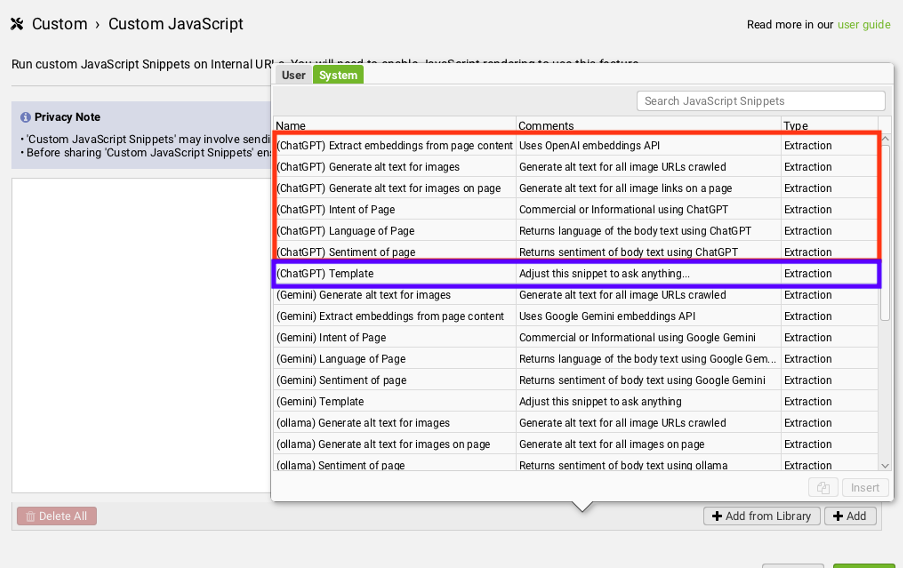
We’ll be using the snippet highlighted in blue, as these allow for customisation.
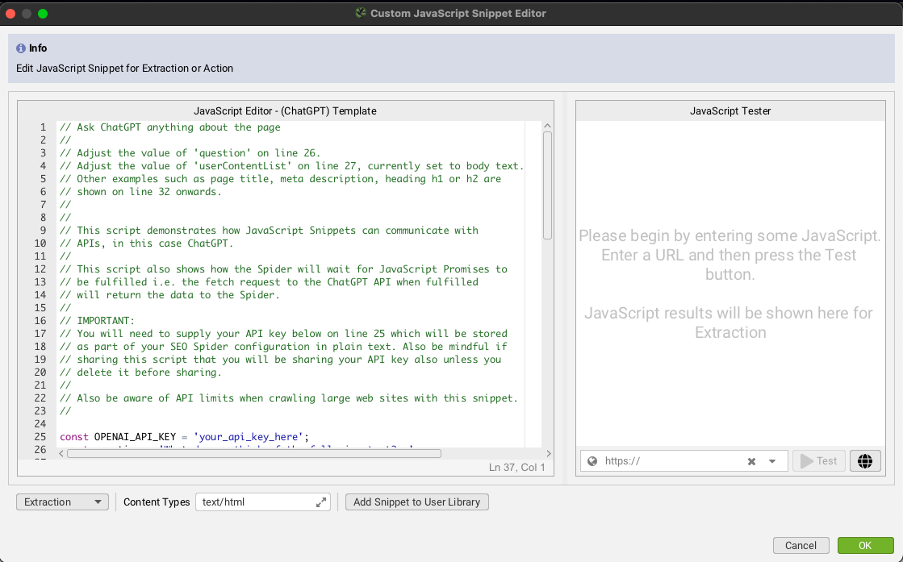
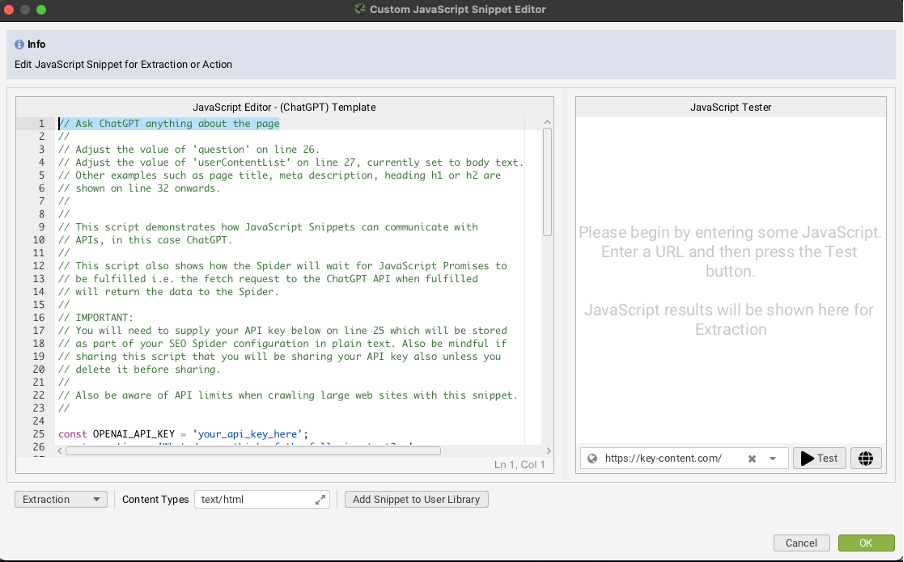
Select the ChatGPT Template
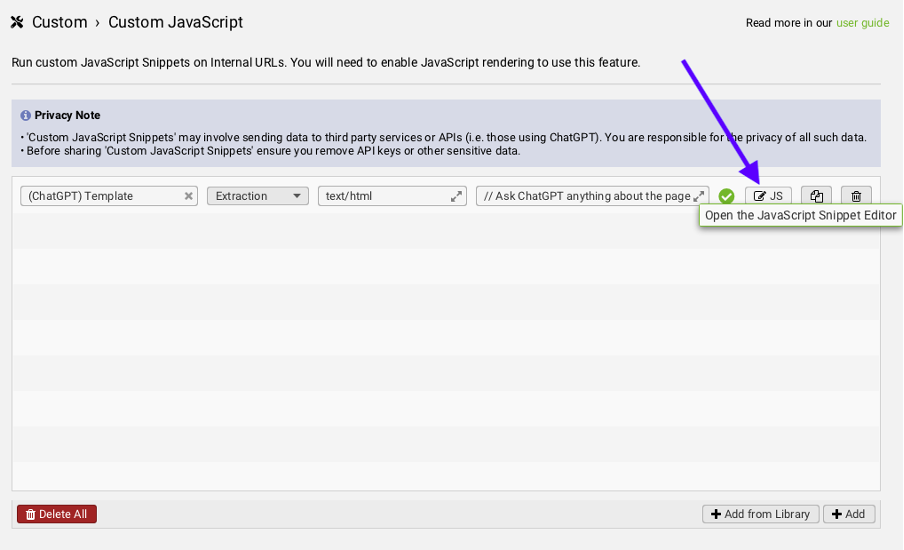
Enter your OpenAI API key in row 25.
The OpenAI API key is separate from a ChatGPT subscription and is simple and affordable to set up. The easiest way to get started is by signing up for an OpenAI account, choosing the ‘API’ option, and navigating to the billing section. There, you can add a fixed amount of credit, like $100, to your account and set spending limits. Review the API pricing details carefully to understand the costs associated with tokens.
Please note that for security reasons, remove the key if you share this snippet with others.
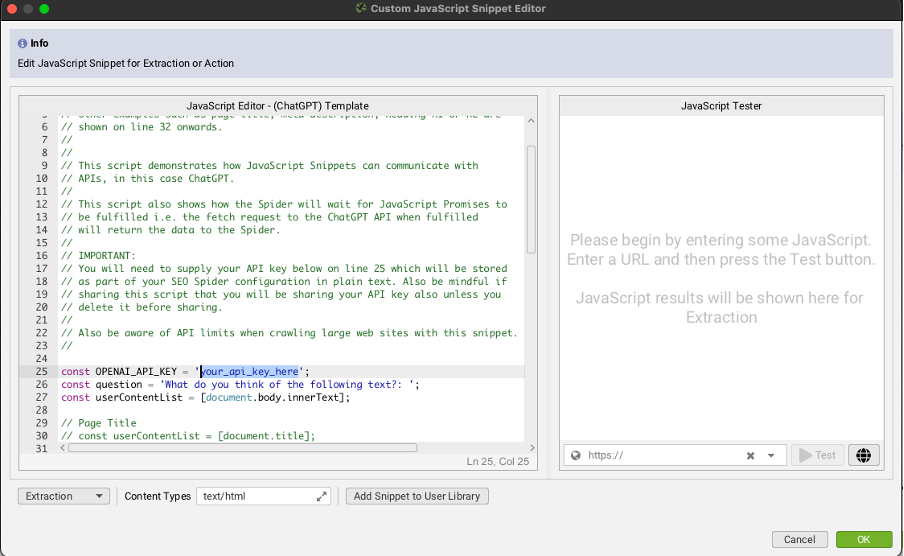
Following the instructions, write your question in line 26 and adjust the value on line 27, currently set up for body text.
See other examples on line 32 onwards:
Adjusting Your Prompt
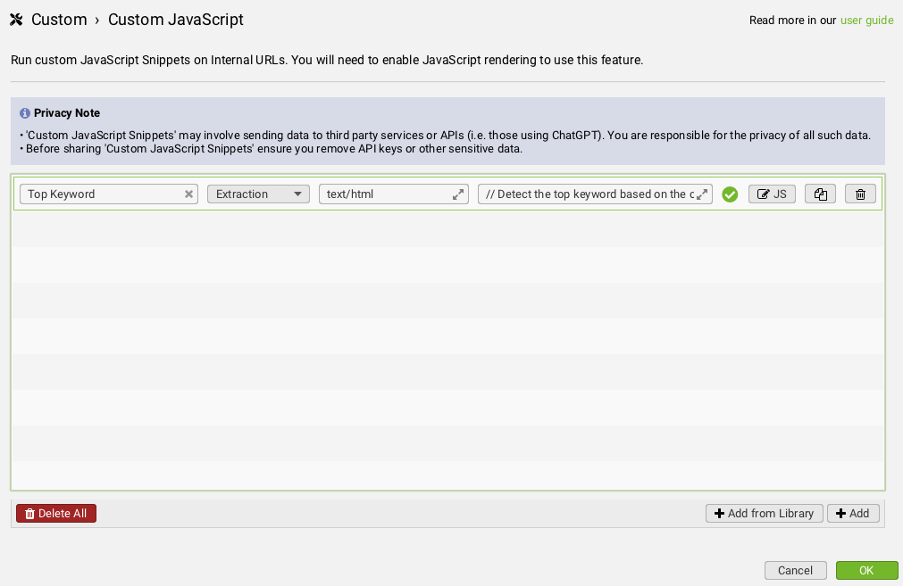
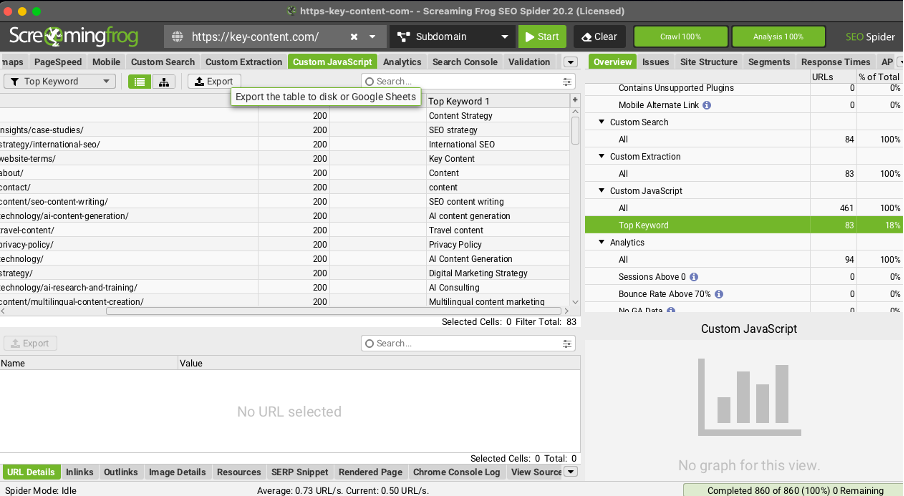
In our example, we asked ChatGPT to extract the main keyword based on the body text.
This is where the customisation happens. On line 26, you can change the default prompt, ‘What do you think of the following text?:’ to your custom prompt. For instance, you could use prompts like ‘What language is this text?’ or ‘Generate a meta description for the following text that is under 155 characters in length, includes any USPs, and has a call to action at the end.’
ChatGPT Prompt Customisation
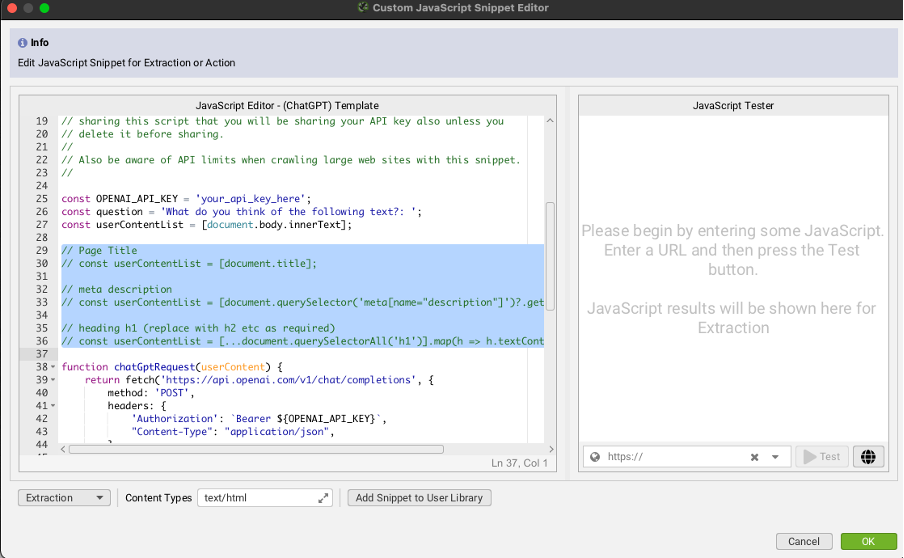
On line 27, you can modify the content used for the prompt. By default, it uses the body text, but you can change it to the page title, meta description, or headings, for example.
The comments from lines 29 to 36 provide examples of how to implement these changes, with more examples included below:
HTML: [document.documentElement.outerHTML];

Body Text: [document.body.innerText];

Page Title: [document.title];

Meta Description: [document.querySelector('meta[name="description"]')?.getAttribute('content')];

h1 Heading (replace with h2, etc., as needed): [...document.querySelectorAll('h1')].map(h => h.textContent);
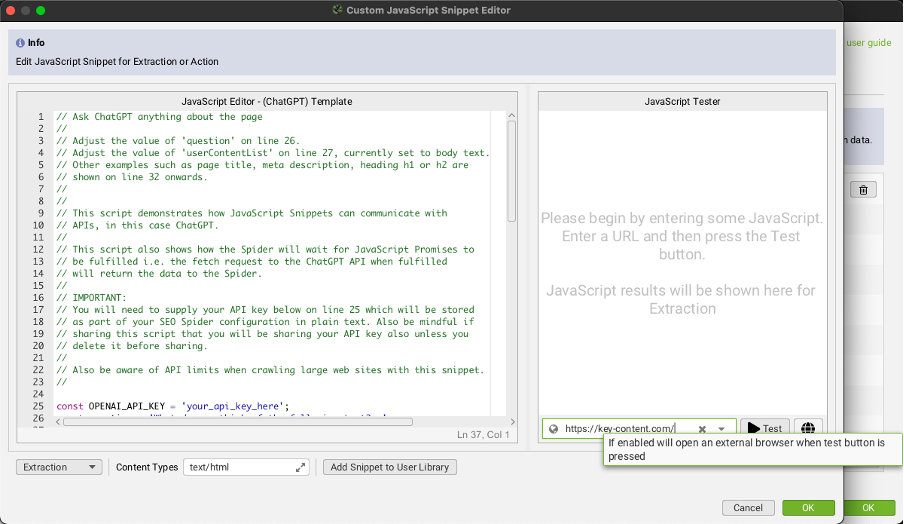
Testing It
Once you’ve set your prompt and selected the content to analyse, you can test it using the tester or by running it in a browser. Enter a URL on the right-hand side of the JS tester and click ‘Test’ to check that it’s functioning as expected.
Adding the Snippet to the Library
Change the name of the snippet on line 1, then save it to your user library.
In our case, it is “Extract the top primary keyword of the content based on the context:”
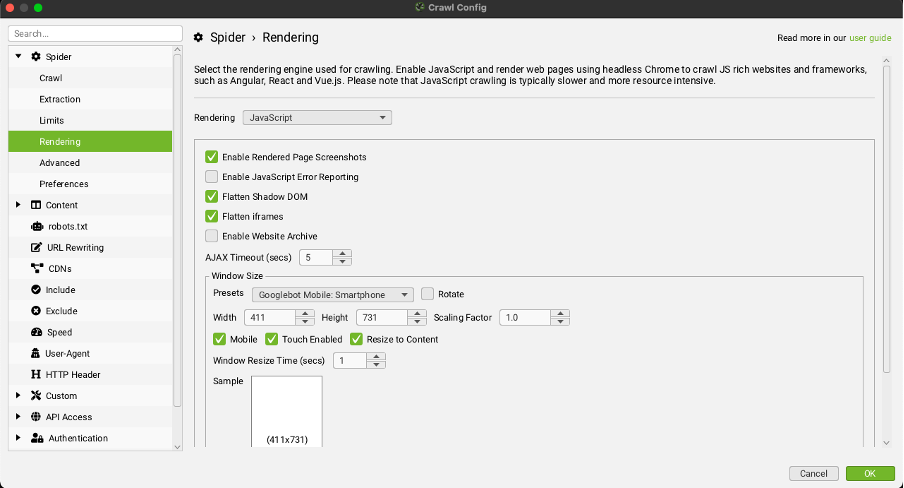
How to Enable JavaScript Rendering?
To execute custom JavaScript snippets, you must enable JavaScript rendering mode by going to ‘Config > Spider > Rendering’.
Click here to start the analysis after the crawl:
Extracting Data
Run the crawl, after this is done the analysis will start.
Once the analysis is complete you can view the data in the custom JavaScript section and download it as usual.
Common errors creating a custom ChatGPT Javascript Snippet
TypeError: Failed to Fetch
This error will appear in both the JS snippet tester and the Custom JavaScript tab and column as:
If you test the snippet in the Chrome Console, as described in the tutorial above, you might encounter the following error:
Refused to connect to ‘https://api.openai.com/v1/chat/completions‘ because it violates the following Content Security Policy directive.
This indicates that the site has a ‘Content-Security-Policy’ header that prevents access to the OpenAI domain. As a result, you cannot run any OpenAI ChatGPT snippets for that URL.
The Model Does Not Exist
This error will appear in the JS snippet tester and Custom JavaScript tab and column as:
The model gpt-4o does not exist or you do not have access to it.
If you’re using one of the default snippets, it typically utilises the gpt-4o model, which certainly exists. Therefore, ensure that you have a funded OpenAI account with the appropriate access permissions.
Check which models you have access to in the OpenAI playground under the ‘model’ selection tab in the settings.
Find here more help: https://www.screamingfrog.co.uk/seo-spider/tutorials/how-to-debug-custom-javascript-snippets/
Empty results
If you see empty results, double-check that you’ve enabled JavaScript Rendering!
Final thoughts
Screaming Frog, combined with the power of ChatGPT, opens up a world of opportunities for SEO professionals. Whether it’s generating meta descriptions, analysing content, or identifying technical issues, this integration’s flexibility and functionality can greatly improve the quality and efficiency of your SEO audits. One of the standout benefits is, that you don’t need to know how to code; Screaming Frog’s user-friendly interface and pre-configured templates make it accessible to everyone, so you can easily implement advanced features with just a few adjustments.
However, it’s important to note that while this tool offers powerful capabilities, adding too many instructions for ChatGPT can slow down the crawling process. Pay attention to this when planning your audits, as it may impact the efficiency and speed of data collection. By balancing the depth of analysis with performance, you can leverage the potential of Screaming Frog and ChatGPT fully to gain valuable insights and optimise your website’s performance.
Recommended reading: Google’s Search Generative Experience (SGE) capabilities and SEO Impact